Wednesday, May 31, 2006

CIA boot camp (part 1)


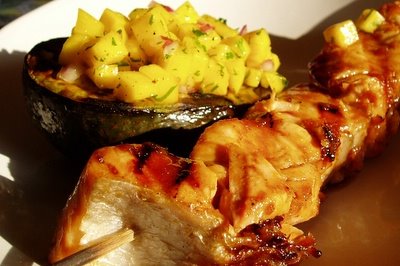
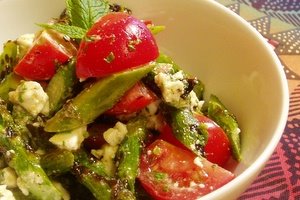
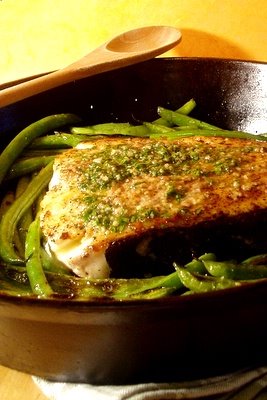
I had a long and rainy drive from Hyde Park, NY to Boston to figure out what to write about the boot camp program at the CIA. But as I stumbled through my front door, soaked and tired, I still didn’t know where to begin. I was happy to be home, happy to be with Jason, happy to be in my own kitchen. As we were finishing our dinner of grilled mahi and braised fennel that Jason so lovingly prepared to welcome me home, I must have gotten unusually quiet and if you’ve ever met me in person, you’d know that quiet is not my normal state. "You have to promise me something," said Jason. "Promise that you'll tell the truth on your blog." The problem is that the truth is not always a comfortable thing to tell, particularly when talking about famous restaurants, chefs, and culinary schools, but I’ll do my best.

In stead of recounting events day by day as they happened, I am organizing my thoughts by topic. I doubt all the topics will fit into one post – as you know I have an opinion about pretty much everything, but one has to start somewhere.

Campus:
The campus is absolutely stunning. It was a Jesuit seminary until the 70's, which gives the place its grandeur and lore. During our tour, we learned all kinds of interesting bits of trivia, like the fact that the meat room is where Jesuit crypts used to be and that the main dining hall used to be a chapel. The courtyards, the fountains, the ivy clad walls, and the number of people running around in uniforms makes you feel like you are in Hogwarts of pastry and cookery (as Tasting Menu so accurately named it).

The fountain in the courtyard of Roth Hall (the main building above)


Colavita center for Italian food and wine and restaurant Caterina de' Medici


Student Dining Hall

All kitchens and classrooms have glass windows on the hallway facing wall. This allows tours to peek in without disturbing classes. At first, it felt weird to have people staring at you as you chop your onions, but after a few days we got used to it.

When it was our turn to go on a tour, we got to peek in on a mushroom identification class.

The students:
There were 15 students participating in the boot camp program. 13 from US, 1 from Canada, and 1 from Mexico. The experience ranged from complete beginner to experienced home cooks. We were divided into 5 teams of 3. The lectures and demos were done with the whole class, but cooking assignments were different for each team. Here is our team #5:

from left to right: Mark, Helen (that's me), George

Schedule:
Our days looked roughly like this:
6:30 - 7 Meet with your team to plan how to cook that day’s dishes
7 - 8:30 Lecture
9 - 10 Demo by the chef
10 - 12 Each team cooks the dishes assigned to them that day
12 - 1 Eat what we cooked for lunch
1 - 1:30 Chef reviews our dishes
2 - 4 Wine tasting OR food and wine pairing OR more cooking lecture
6:30 - 9 Dinner in one of CIA’s restaurants

Topics we covered:
Day 1: Knife skills and stocks
Day 2: Dry heat techniques (sauté, pan-fry, deep-fry), soups, and thickening agents
Day 3: Dry heat techniques without fats (grilling, broiling, roasting)
Day 4: Moist heat cooking (braising and poaching)
Day 5: Final project (each team was given 2 main ingredients and we had to come up with an appetizer and entrée to feature those).

The instructor:
Ok, so maybe I got a little put off when our chef instructor, told us he hates sushi and wants all fish to be cooked through, but I must say, he was a wonderful teacher. He managed to keep us on our toes and laughing at 7 am 5 days in a row. His mother-in-law played a large part in making sure we were well entertained as she appeared in a number of hilarious stories about turkey, risotto, and most of the basic cooking techniques.

Lectures and Demos:
Unfortunately, I didn’t learn much during lectures. Maybe it’s because I already understood the basic cooking techniques, or maybe because I learn better by watching than by listening. That’s why the demo was my favorite part of the class. The chef would pick out a few of the dishes we were cooking that day and demonstrated how to make them. That's where I picked up all kinds of little tips and tricks like how to tie a butcher’s knot, how to keep risotto from turning gummy, how to unroll pasta ribbons when cutting them by hand, etc. I just couldn’t help wishing that we drop the useless lecture and spend that time on demos and hands-on work. For example, the knife skills demo and practice only covered veggies (no deboning a chicken, filleting a fish, or trimming meat). The stocks were discussed in lecture, but we didn’t get to make them, which was a shame as I was really looking forward to that. Same for the sauces and thickeners – just lecture, but no demo or practice.

Plate presentation:
When we only had one week to go through all the basic cooking methods, the last thing I expected them to spend time on was presentation. But that’s what took up a whole lecture the first afternoon and that’s how our plates were critiqued every day – based on how they looked, not how they tasted. When you think about it from the professional cook’s point of view, it makes perfect sense. Customers eat with their eye. Few can tell if your dish is slightly under-seasoned or overdone, but everyone can tell if your grill marks are in the right place and if the food looks “gourmet" vs homey. When you realize that you can charge twice as much for the same dish in a restaurant if you make it look a little taller and place it on a plate with a wide rim, you start paying attention to this stuff. Of course, I don’t cook in a restaurant, so this stuff didn’t feel particularly interesting to me, but learning it didn't hurt. Here is what we learned about presentation:
• Don’t put your ingredients into different corners of a plate like a TV dinner.
• Create a central focus point (everything should overlap).
• Give your food some height, but not too much.
• Make sure all garnishes are edible (no rosemary or parsley sprigs).
• Use contrasting colors and textures.
• Nothing should touch the rim of the plate – the rim is like a frame of a painting.

Of course, as soon as you start creating rules, the really “cool” people start breaking them. Have you noticed how some of the more upscale restaurants started putting different parts of a dish into different corners of a plate and making food look really flat. These days, the TV dinner or deconstructed food is the new chic look. It’s just that the culinary schools didn’t catch up to it yet. Just like fashion, it goes in circles.

I must say that by the 5th day, our food looked like a brunch buffet at an upscale hotel, but still didn’t taste much better than a good cafeteria. Though, then again, that's what a buffet at most hotels tastes like.

Of course a lot of this could be explained by cooking in unfamiliar kitchen with 15 other people running around trying to locate their equipment and ingredients. I am sure many of these dishes would have tasted much better if we were cooking them in our own kitchens. But the fact that the emphasis of the class was on looks and timing and not on the taste didn’t help. In fact, the only explanation of doneness was to use a thermometer and the only explanation of seasoning was to add “enough” salt.


What did we cook? Come back tomorrow to find out.

Saturday, May 20, 2006

Culinary Boot Camp

I am one of those weird people who love school. I remember one day in 9th grade, crying because summer was coming and that meant no more classes, notebooks, graph paper, freshly sharpened pencils, or problem sets. I know, there is help for people like me, but I’ve never looked into it. Instead, I spent ridiculous number of years in school studying subjects I had no clue about, but that sounded like they might make a good career.

When I was 7, my Mom signed me up for music school because that’s what half of Russian girls did and because she thought that one day I might want to become a music teacher. Good thing I didn’t realize that I didn’t have much talent because I enjoyed every minute of it. I loved listening to music, learning about different composers, and even practicing the piano. When I came to US at 13 and my parents explained to me that music doesn’t make money here and I should find something else to do with the rest of my life, I was devastated.

But as long as there was some sort of school, life went on. Since I did well in math and science classes, I got a scholarship to study computer science at Carnegie Mellon after high school. I had no idea what computer science was, but everyone seemed to think it’s a good thing to study if you want a well-paying job. So I did it. It was both a fun and painful experience (French, art history, philosophy, studying abroad and pretty much everything except for computer science were fun, and computer architecture, programming languages design, linear algebra, and networking were painful).

But when I became serious about cooking and started looking for careers that involved food, for the first time in my life I decided against school. My husband was in grad school, we needed to pay the mortgage, and I came to terms with the idea that the best way to learn more was to read and practice. Besides, $40,000 for training in a career that is notorious for low pay and terrible hours did not seem practical. When you come to this country as an immigrant and start with absolutely nothing, practicality is not one of those concerns you learn to ignore even when working in a well-paid software job.

But then, I found the Restaurant Slave blog describing another software girl’s adventures interning in a restaurant kitchen. I was hooked. I called restaurant after restaurant in Boston until I found one that would take me as a slave. I spent 9 months chopping onions, deboning fish, and working the cold station 2 nights a week. It was one of the best experiences of my life. I learned more than I’ve ever learned in school of any kind. But I could only handle this crazy schedule (full-time job, restaurant, and teaching cooking classes), for so long. No, it didn’t convert me to becoming a restaurant chef – the hours are just not for me. But there are certain things that I miss terribly. I miss the camaraderie of the kitchen. I miss learning new cooking techniques on a regular basis. I miss chopping 20 Lb of onions until my hands know what they are doing without me even looking.

That’s how the idea of going to culinary school started creeping back into my head. Since a 2 year degree was still not an option, I decided to look into shorter programs. After considering my options for short programs here and abroad, I finally found one that looked right – the culinary boot camp at CIA. 5 days of cooking, wine tasting, and food wine pairing from 6am to 9:30pm. That’s my idea of vacation!

I signed up 4 months ago and have been anxiously waiting for that special week to come. But with the craziness of work, teaching classes, cooking, and writing, those 4 months flew by in a blink of an eye. Then I woke up this weekend and realized that I needed to pack.

You know, I really missed school these past 7 years. School makes me feel like a fish in water. But I wonder how it’s going to be different this time. For the first time, I am going to school purely for the joy of learning, not to get good grades, not to get a diploma, not to get a job. It’s a strange feeling. I get butterflies in my stomach just thinking about it. One more day, and I’ll get to wear chef’s whites, meet other passionate cooks, and try to soak up as much cooking wisdom as possible in 120 hours. I’ll probably learn that I’ve been making my stocks and sauces wrong all these years, but that’s part of the fun.

What do I hope to learn? They told us to bring out questions, so here are mine:

How to cook meat, particularly large roasts
How to cook en masse (for over 25 people)
How to pair food and wine
Which steels work best for sharpening knives (steel, porcelain, or diamond)?
And you are gonna laugh now, but I want to learn how to make a really spectacular burger.

I promise to bring back lots of stories, pictures, and cooking techniques when I return next weekend. Wish me luck :)

Thursday, May 18, 2006

Grilled Salmon with Avocado and Mango Salsa

Last week, we’ve been eating soup, soup, and more soup. To combat the never ending rain, I went on a soup binge and made every soup I’ve been meaning to try but never got around to: parsnip soup, carrot-lime-garlic soup, and potato fennel soup. Now, I am all souped out, and as the sun came out, so did my craving for something grilled and tropical. I’ve been meaning to try Bea’s sautéed avocados for quite some time, but since I was making grilled salmon and didn’t feel like dirtying a pan, I decided to try grilling avocados. They browned beautifully and made cute little bowls for mango salsa.

I can see you raising your eye-brows now. Didn’t she tell us last week to branch out and try other fish? Whenever I post a salmon recipe, my co-workers and friends, who read my blog, tease me with “Aren’t you supposed to be beyond salmon?” That’s right --beyond salmon, but not against salmon. This is an equal opportunity blog, and every fish deserves its spotlight. Besides, how can I resist the succulent sweetness of grilled salmon -- rich and silky like the butter of the sea.

Cutting up your salmon into chunks and putting it on skewers might be photogenic, but it makes turning more difficult. If you are new to grilling fish, get salmon steaks since they are the easiest cut to work with for grilling and glazing. You can also use salmon fillets cut into 6-8 oz pieces.

Serves 4

For mango salsa:
1 mango, peeled and finely diced
1/4 cup minced red onion
2 Tbsp chopped cilantro or mint
Zest of 1 lime
1 Tbsp fresh squeezed lime juice
Salt, pepper, and hot sauce to taste

For salmon:
2 Lb salmon steaks (or 4 salmon fillets with skin, 6-8 oz each)
Salt and pepper
2 tsp olive or canola oil, plus more for brushing the grill
1/4 cup duck sauce (or sweet and sour sauce)
1/4 cup teriyaki sauce (or Japanese soy sauce)
1 inch ginger root, peeled and finely grated
1 tsp sesame seed oil

For avocados:
2 avocados, halved lengthwise and pitted (don’t peel)
2 tsp lime juice
2 tsp olive or canola oil
Salt and pepper

Mango salsa:
Combine all ingredients in a small bowl, season to taste with salt, pepper, and hot sauce, and mix well.

Grilling salmon and avocado:
The basic idea here is to brown salmon on the grill without the teriyaki glaze to make it “non-stick”, and then continue grilling it until it’s done, brushing it with teriyaki glaze and turning every couple of minutes. Keep the grill covered during the whole cooking time, except for when flipping and glazing. The estimated cooking time for fillets is 6-8 minutes per inch of thickness and for steaks -- 8-10 minutes.

Tips for grilling fish
  1. Preheat the grill to high.
  2. Dry salmon well on paper towels, season lightly with salt and pepper and rub with 2 tsp oil (go easy on the salt since teriyaki sauce is salty).
  3. In a small bowl combine, duck sauce, teriyaki sauce, ginger, and sesame seed oil. Mix well.
  4. Pick up a wad of paper towel with tongs, dip it in oil, and brush the preheated grill. Immediately place salmon steaks on the grill (if using fillets start grilling on the skin side). Cover the grill and cook for 3 minutes.
  5. Dislodge salmon from the grill using a fork, and then flip using tongs. Brush the grilled side with teriyaki sauce mixture. Place avocados on the grill cut side down.
  6. After 2 minutes, turn avocados a quarter turn to create diagonal grill marks. Watch them carefully, as soon as they brown remove them off the grill and set aside. Flip salmon and brush with more teriyaki sauce. Cook 2 more minutes. At this point the avocados should be browned.
  7. Brush salmon with more teriyaki sauce and flip again. After 1 more minute, test salmon for doneness by inserting a knife near the bone. If it slides in easily and you can gently pull the flesh from the bone, salmon is done. Salmon is best when slightly undercooked, so feel free to take it off the heat when it’s still translucent in the center and you encounter a bit of resistance when sliding a knife near the bone.
  8. In a small bowl, mix 2 tsp lime juice and 2 tsp oil and season generously with salt and pepper. Brush this mixture onto the cut sides of avocado. Stuff each avocado half with mango salsa and serve with salmon.

Tuesday, May 16, 2006

Parsnip soup with fiddleheads

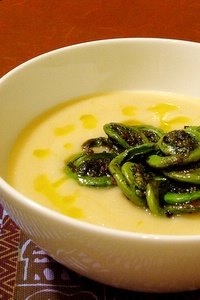
Boston is turning into Seattle, except that our coffee still sucks and sushi could definitely be better. A week of non-stop rain is really getting to us here, which made me reach for the secret weapon to cure the wetness blues – soup. After going through my mental list of “soups to try” I settled on creamy parsnip soup. I had such a wonderful version at a local café for lunch recently, that I was inspired to try it at home. The process of making it is not much different from turnip soup, celery root soup, or any other creamy root vegetable soup. The trick is to cook parsnips long enough to make them very tender, this ensures that the resulting soup will be smooth and creamy.

To remind us that it’s not the middle of October, I topped the soup with sautéed fiddleheads, for a spring touch.

Serves 4

For the soup:
1 Tbsp olive oil
1 onion, sliced
1 celery stalk, sliced
1 Tbsp butter
1 1/3 Lb parsnips, peeled and cut into 1/2 inch dice
5 cups water
1 carrot, peeled and left whole
Bay leaf
1/4 cup cream
Salt and pepper

For fiddleheads:
1/2 Lb fiddleheads
1 Tbsp butter
1 garlic clove finely chopped
1/2 tsp fresh lemon juice

To make the soup:
  1. Set a large soup pot over medium heat. When hot, add olive oil, onions, and celery. Cook stirring occasionally, until tender and golden brown, about 10 minutes.
  2. Add butter and parsnips. Turn up the heat to high and cook until parsnips just start to brown, about 5 minutes.
  3. Add water, carrot, salt to taste, and bay leaf. Bring to a boil. Partially cover, and simmer on med-low for 1 hour or until parsnips are very tender.
  4. Stir in cream. Take the soup off heat, uncover, and cool 10 minutes. Remove carrot and bay leaf.
  5. Process in a blender until smooth. If soup is too thick, add water to reach desired consistency. Season with salt and pepper to taste.
To make fiddleheads:
  1. Bring a medium pot of salted water to a boil.
  2. Snap the ends off fiddleheads and wash them in a bowl of cold water, rubbing them gently to remove loose leaves. Remove fiddleheads with a slotted spoon.
  3. Put fiddleheads into the pot of boiling water. Cook for 2 minutes and drain.
  4. Set a large skillet over medium-high heat. Add butter. When butter melts, add garlic and fiddleheads and cook stirring occasionally until fiddleheads are browned on both sides, about 5 minutes. Take off heat.
  5. Stir in lemon juice. Season with salt and pepper to taste.
Pour soup into bowl. Top with fiddleheads and drizzle with olive oil.

Saturday, May 13, 2006

Blinchiki -- inspired and dedicated to my Mom

I find the question, “So how did you learn to cook?” and circumstances under which it’s asked kind of rediculous. People ask me that so casually and so often you’d think it’s as straightforward as “What’s the weather?” “Where do you live?” and “Who are the Red Sox playing tonight?”

But “How did you learn to cook?” is a question as fundamental and complex as “How did you fall in love?” When people ask me that, I never know where to begin. No one taught me more about French cooking than Julia Child, or about Italian cooking than Marcella Hazan. Traveling all over Mediterranean didn’t hurt either. And if it wasn’t for chef Ruth Anne Adams, who took me in as her intern, my knife skills would still be embarrassing. But if I had to choose one person who made me truly fascinated and later addicted to the kitchen, it would have to be my Mom.

As soon as I got my first teeth, I was itching to sink them into something good like caviar, pelmeni, herring, or my Mom’s amazing roast chicken with prunes. Yes, I loved to eat since the beginning of my existence, but it wasn’t until I saw my Mom flipping blinchiki (Russian crêpes) that the concept of cooking came onto my radar. Blinchiki are a weekend breakfast tradition in our family. I am guessing I was 6-7 years old when I first saw my Mom make them. I found the process so fascinating that I spent weekend after weekend watching her pour the batter into a hot skillet, swirl it in a graceful motion that made a perfect circle, gently slide a butter knife under a barely solidified batter, and swoosh! – it was on the other side. It was like magic! How did she get something so liquidy to become solid and paper thin in a matter of seconds? And how did she make it land back in the skillet without a single wrinkle? I remember holding my breath when my Mom would start loosening blinchik (singular of blinchiki) with her favorite butter knife (she had a special knife reserved just for this task). I was trying very hard not to blink so that I could see exactly how she flipped it, but each time it happened too quickly.

By the time I was 9, I started begging my Mom to teach me how to flip these objects of my fascination. But all she’d say was that one day I’ll learn. By 10, I was beginning to get seriously worries that one day will never come. I was imagining being really old, like 20 years old or something and still not knowing how to do it. “If you are so worried,” my Mom said one day, “why don’t you just mix up a batter when you come home from school and practice.” Doing it all alone seemed both exciting and terrifying, but one day I just did it. My first batch resulted in a pile of scrunched up pieces of batter that were too thick, too thin, torn, wrinkled, and generally mutilated in all sorts of ways. By the second batch I actually managed to flip a few! My flipping average was not very good and only 1 in 5 pancakes actually resembled proper blinchiki. But it was definitely progress.

I remember being mad at my Mom for not being there with me when I was learning something this challenging. But my Mom did not believe in cooking classes, recipes, or cookbooks. She believed in practice. Letting me find my own way in the kitchen was the greatest gift she could have ever given me. She was by the stove with me that day in spirit and is to this day. And that’s the story of how I learned to cook.

Dear Mommy, I know you’ll be reading this post. Happy Mother’s Day and thanks for everything you taught me about blinchiki, cooking, and life.


Helen’s Mom’s Blinchiki

Serves 4

1 1/2 cups all-purpose flour
1 tsp kosher salt (or 3/4 tsp table salt)
1 tsp sugar
2 large eggs
1 cup cold milk
1 cup cold water
4 Tbsp oil
Butter for frying

The night before making blinchiki:
  1. In a large bowl, mix flour, salt, and sugar.
  2. Beat in eggs and milk into flour using a whisk. Beat until no lumps remain.
  3. Beat in the water. The mixture should be the consistency of light cream. If too thick, beat in another 1-2 Tbsp of water.
  4. Beat in the oil, cover, and refrigerate at least for 2 hours or overnight.
To fry blinchiki:
  1. Preheat the oven to 350F.
  2. Take the batter out of the fridge and whisk to even out consistency.
  3. Set a well seasoned cast-iron or non-stick skillet 6-10" in diameter with flared sides over med-high heat.
  4. Unwrap the stick of butter to expose about an inch. Hold the stick by the wrapper and quickly glide the expose end over the skillet to butter it. You don't need to cover every inch of the skillet. 3-4 broad strokes will do.
  5. Pour: Fill the ladle with batter, pour some into the pan and swivel quickly in a smooth round motion. Pour more as needed to fill in the holes. This is a trial blinchik to give you an idea of how much batter you need for your pan. About a minute after you pour your batter, the bottom will be brown and it's time to flip the blinchik. There are two ways to do that.
  6. Flip Method 1 - Tossing: If your pan is small and light, the best way is just to toss your blinchik in the air and catch it with your pan. This is really much easier than it looks. Just put a potholder on the counter and bang you pan on it to dislodge the blinchik. Once it moves easily in the pan, quickly move your pan in a circular motion starting down and away from you. The blinchik will jump and flip. It sounds scary, but after a couple of them, you'll be an expert.
  7. Flip Method 2 - Using a butter knife: This method works for any size or type of a pan. Gently move a butter knife around the perimeter of the blinchik to unstick the edges. Then move you knife deeper in couple of spots to dislodge your blinchik. Once it moves easily in the pan, stick the knife under the blinchik along the full diameter, and flip it onto the other side.
  8. After 30 seconds on the other side, your blinchik is done. Slide it out of the pan and onto a plate. Repleat the whole process (starting with buttering the pan) with the remaining batter. After you are done making blinchiki, cover the plate tightly with foil and place in 350F oven for 7-10 minutes to rewarm.
  9. Present the whole stack of blinchiki to the table and let everyone dip them in lightly salted melted butter, or fill them with preserves or nutella.

Thursday, May 11, 2006

Technique of the Week: How to Grill Fish

I just realized that there is one more day left before the Summer BBQ Challenge deadline from Lex Culinaria, so I couldn't help writing a post about grilled fish. Last year I wrote a detailed "How to grill fish" article on my pre-blog website. Although the pictures aren't great (that was before I picked up all these great tips from all you bloggers), the grilling instructions and tips are still the same, so I won't bother reproducing them all here. But I do have a bit of fish grilling philosophy to share with all you grill masters. A good piece of grilled fish is like a tight black dress -- simple, elegant, and easy to dress up or down. Whether I am dealing with clothes, home décor, or food, I am an accessories girl. I like to have a neutral base that I can mix and match with scarves, belts, pictures, vases, sauces, drizzles, and flavored butters.

Hmm, did I just use scarves and flavored butters in one sentence? But you know what I mean -- they are accessories and in order to make them work you need a base that is beautiful but neutral. That's why my favorite grilled fish recipes have only 3 other ingredients: salt, pepper, and olive oil. Glazes, marinade, and brines -- I've tried them all, and I must say that with 9 out of 10 fish, nothing beats salt, pepper, and olive oil. When grilling dense fish like swordfish and mahi, a good marinade is invaluable, but most other fish don't need much help on the grill. In fact, they'll stick more and won't develop as crispy of a skin unless you leave them alone.

Instead of looking for yet another glaze for salmon this summer, how about branching out to other fish. Try bluefish, striped bass, red snapper, or barramundi (that's the one in the picture). Just follow the basic grilling instructions, and have fun accessorizing!

Wednesday, May 10, 2006

Grilled Asparagus, Tomato, and Feta Salad


Last time I wrote about asparagus, it was a little early for grilling. But the Summer Barbeque Challenge from Lex Culinaria and Asparagus Aspirations event from Seriously Good gave me a perfect excuse to make one of my favorite summer salads – grilled asparagus with tomatoes and feta. I threw this dish together last summer because that’s what I had on hand, and liked it so much that I’ve made it half a dozen times since then. It’s hard not to love the simplicity and harmony of this dish. Tomato juices get infused with the smokiness from grilled asparagus and turn pink as the tangy chunks of feta melt into them ever so slightly. Make sure to have lots of good bread to dip in the juices. This salad feels so Mediterranean that I am surprised I’ve never encountered it in any Mediterranean countries. If you’ve seen this combination before, please let me know where – I am very curious.

Serves 4

1 Lb asparagus
1 Lb cherry tomatoes, halved
1/3 Lb feta (French sheep milk Valbresso is excellent for this salad)
2 Tbsp chopped mint (parsley, cilantro, and basil work well too)
2 tsp lemon juice
1/2 tsp balsamic vinegar (optional)
2 Tbsp olive oil
Salt and pepper
  1. Preheat the grill to high.
  2. Snap the tough ends of asparagus, and place the trimmed spears in a baking dish keeping them pointing in the same direction. Sprinkle with salt and pepper, drizzle with 1 Tbsp olive oil, and toss with tongs keeping all spears still pointing in the same direction.
  3. Place asparagus on the grill perpendicular to the rack so that the spears don’t fall through. Cover the grill and cook for 2 minutes or until browned. Turn the spears with tongs. If your spears are all pointing in the same direction, an easy way to turn them is to place tongs on top and roll asparagus over 5-6 spears at a time. Cover the grill and cook asparagus 2 more minutes or until browned. Remove asparagus back to the baking dish and cool for 10 minutes. Put asparagus on a cutting board and cut crosswise into 1 inch pieces.
  4. Move asparagus to a large bowl. Add tomatoes, feta, and mint.
  5. In a small bowl, whisk lemon juice, balsamic vinegar, and the remaining tablespoon of oil. Pour over asparagus salad, season to taste with salt and pepper, and mix well.

Wednesday, May 3, 2006

How to Cook a Wolf (of the sea)

The New Deal Fish Market is barely over 4 miles from my house, but if you think that’s close, you’ve never driven in Boston. Driving 4 miles in Boston during rush hour is not much faster than walking and makes it completely unpractical for me to go to New Deal during the week. I love Captain Marden’s, the place where I shop during the week, but it’s just not the same. There is no hustle and bustle, no whole fish, and no one knows me by name or remembers what fish I bought last week.

Last Saturday, lovely Bea from La Tartine Gourmande joined me for what’s become a tradition in my house – a Saturday morning trip to New Deal. It was so much fun to go food shopping with someone who enjoys it as much as I do. Since Bea hasn’t been to the New Deal before, Sal greeted her with his usual “Where are you from?” When she said France, he gave her a little tour of the fish counter in French. This was a fun experience for me too since my French is incredibly rusty. I can’t say my grammar improved much from this little trip to the fish market, but I did learn the name of the fish I bought for dinner: loup de mer. Literally, it means “wolf of the sea,” which makes sense since this fish is silver-gray. You’ve probably seen this popular fish on restaurant menus under its Italian name of “branzino” or the English name of “Mediterranean Sea Bass”. This little fish weights about 1 Lb -- a perfect size for individual servings. Its white flesh is fatty and packs lots of flavor and the skin is delicate and yummy when browned.

After the endless experiments of last week, I wanted a tried and true dinner. Something that I knew was going to work. I decided to dress my little sea wolves with fennel, preserved lemons, and olives and cook under the broiler. I don’t understand why cooking whole fish in foil, parchment, or on the grill is so much trendier that broiling. When you broil you get the best of both worlds – the fish browns like it would on the grill, but the juices stay in the pan making a wonderful sauce. After taking the first bite, Jason said, “You know what your problem is?” “What?” I asked. “Sometimes you get tired of cooking fish.” I must admit that with Jason’s baguette this was a perfect dinner and that’s hard to get tired of.

Mediterranean Bass with Fennel, Preserved Lemons, and Olives

Fish substitutions: sea bream (dorado), red snapper or any 1-2 Lb whole fish

Note: This technique only works for gas broilers. If you have an electric stove, it’s better to roast fennel with lemons in 450F oven until brown (about 15 minutes) and grill the fish separately (or brown it in a non-stick or cast iron skillet) and then combine the fish with fennel and olives before serving.

Serves 2

2 whole Mediterranean bass, about 1 Lb each, scaled, gutted, gills and fins removed
(tip: see how to cook a whole fish)
2 Tbsp olive oil
1 fennel bulb, white parts sliced 1/8” thick
1/4 preserved lemon (or zest or 1 lemon)
6-8 kalamata or black olives, pitted and halved
1 Tbsp minced fennel fronds (the green parts of the bulb that look like dill)
Salt and pepper
  1. Preheat the oven to 450F. Wrap a broiling pan with foil.
  2. Rinse preserved lemon under cold water, dry with paper towels, and discard the inside of the lemon. Slice the remaining peel crosswise as thinly as possible.
  3. In a broiler pan, toss sliced fennel with 1 Tbsp olive oil, preserved lemon, and salt to taste. Cook in the middle of the oven until fennel just starts to soften and brown, about 5 minutes.
  4. Rinse the fish and thoroughly dry with paper towels in and out. Season with salt and pepper in and out and place in the broiler pan with the fennel. Pile fennel on top of the fish and drizzle with remaining tablespoon of oil.
  5. Turn the oven to broil. Set the fish under the broiler for 5 minutes. Flip using a spoon and a spatula; rearrange the fennel slices on top of fish to give them all a chance to brown, and broil fish 5 more minutes. Watch the fennel carefully. If it starts to burn, rearrange fennel slices so that they brown on the other side.
  6. A 1 Lb fish (about 1 inch thick) will be done at this point. For fish substitutions thicker than 1 inch, turn the oven down to 425F, and finish cooking in the oven so that the total cooking time (broiling plus baking) is 10 minutes per inch of thickness. Check if the fish is done by inserting a knife between the top fillet and the back bone. If you meet no resistance, the fish is done.
  7. Add the olives to the broiling pan and let the fish rest for 5 minutes.
  8. Place the fish on serving plates, top with fennel and olives, and pour the juices from the broiling pan over fish. Sprinkle with fennel fronds and serve with good bread.

Tuesday, May 2, 2006

Halibut Basted with Bagna Caoda (Anchovy Garlic Sauce)

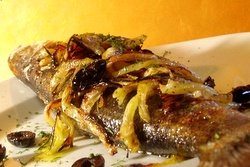
My parents used to joke that if you mixed my brother and me up, stirred really well, and then divided the mixture into two part, you’d end up with two perfect kids: responsible, but not obsessive; willing to explore the world, but always sure to return home; extremely career-driven, but putting family first. Too bad there is no way to achieve such perfection when it comes to people. People come with their strengths and weaknesses and there is not much you can do about that. But when it comes to cooking – anything’s possible.

Take fish for example. Some, like halibut, have exquisite texture – firm, supple, and silky smooth. Some, like anchovies, have oodles of flavor – rich with the taste of the sea. I don’t mean to be picky, but here is the thing: halibut has as much flavor as a skinless chicken breast and the texture of salted anchovies is not that different from little strips of leather. Most of the time, my perfectionist tendencies get me into trouble (at least they do in real life), but in the kitchen, who is to stop me from playing God (or Goddess in my case), and trying to fix nature’s little shortcomings.

So when I ended up with too many anchovies this weekend, I decided to infuse the halibut with their flavor for tonight’s dinner. “Infuse” sounds like a more involved process than it really is. I simply made bagna caoda (an anchovy-garlic sauce from the Piedmont region of Italy, literally meaning “hot bath”), and pan roasted halibut basting it with this sauce. The result was simply “wow!” I never noticed how juicy halibut can be until I cooked it this way. Since halibut juices don’t have much flavor, they are not usually as noticeable. But as the garlic and anchovy oil seeped into halibut, they made each bite mouth-watering and succulent. In other words, this halibut dish is to regular halibut like whole roasted chicken to baked chicken breasts.

For the juiciest results, use bone-in and skin-on halibut steak since all of halibut’s fat is clustered around the bone. Ask your fishmonger to cut it in half so that it’s easier to fit in the pan.

Salt-packed whole anchovies (available in French or Italian specialty stores), are the best kind to use for this or any other dish that calls for anchovies. Rinse all the salt of them under cold running water, and pull the fillets off the back bone (don’t worry about the little bones). Dry fillets well with paper towels before using. Alternatively, use anchovy fillets packed in oil.

Fish substitutions: halibut fillet, cod, haddock, hake, pollock, or any other white mild fish

Serves 4

6 anchovy fillets, dried well on paper towels
1 garlic clove, mashed into a paste
3 Tbsp olive oil
2 Tbsp butter
2 Lb halibut steak (1” thick), cut in half crosswise
1/4 tsp fresh lemon juice
1 Tbsp finely chopped parsley

To make bagna caoda:
  1. Preheat the oven to 400F.
  2. Chop anchovies very finely, then smear them on the board with the flat side of your knife. Alternate mincing and smearing until they turn into a smooth paste. This is the same technique you’d use for mashing garlic into a paste with a chef’s knife. Shortcut: If you have an immersion blender, you can use it to puree garlic, anchovies, and oil, thus avoiding doing it by hand. But don’t use a regular food processor or blender since these quantities are too small.
  3. In a small saucepan, combine mashed anchovies, mashed garlic, olive oil, and butter. Cook over low heat stirring occasionally just until butter melts. Don’t let the mixture boil. Take off heat.
To make halibut:
  1. Season halibut with salt and pepper on both sides.
  2. Set a large oven-proof non-stick or cast iron skillet over high heat and wait for it to get hot (if your skillet is not oven-proof, have a baking dish ready as well). Add a tablespoon of bagna caoda to the skillet and swirl to coat. Add halibut and cook without disturbing until golden brown, about 2 minutes.
  3. Pick halibut up with tongs, add another tablespoon of bagna caoda to the skillet and flip the halibut on the other side. Cook for 1 minute on the stove top.
  4. If you skillet is not oven-safe, move halibut to a baking dish. Top halibut with another tablespoon of bagna caoda, and place the skillet in the oven for 7 minutes or until you can slide a butter knife all the way through when you pierce halibut along the bone. If using a fillet, you can check for doneness by separating the flakes with a fork in the thickest part of the fillet. A trace of translucency should still remains in the center when you take the fish off the heat. Estimate for the total cooking time (stove top and oven) to be 8-10 minutes per inch of thickness.
  5. Return the remaining bagna caoda to medium-low heat. As soon as it simmers, add lemon juice and parsley. Pour over halibut and serve.

Monday, May 1, 2006

Carciofi alla Giudia and other experiments

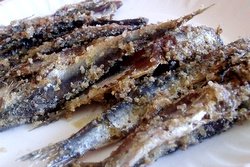
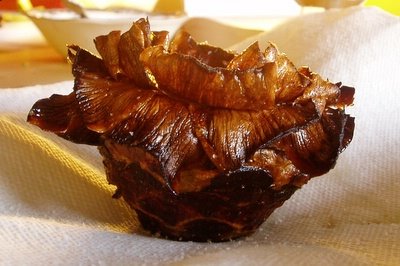
I’ve been one frustrated little food blogger lately. Some dishes of last week had good pictures, some had good stories, and some actually tasted good. But none had all three qualities that inspire you to write. It all started with my attempt to make carciofi alla giudia (deep-fried artichokes). I fell under the spell of this rose bud looking dish on our trip to Rome, but have never attempted it at home until a recent post on chowhound’s home cooking board brought back the memories of crispy leaves and juicy artichoke hearts. After being haunted by artichokes for weeks, I finally decided to give it a try. To be on the safe side, I consulted a few more authorities on this matter: Ilva at Lucullian Delights, and Marcella Hazan’s book. I figured how hard can it be – trim artichokes and put them in hot oil? Others are doing it. Why can’t I? So what if I’ve never cooked artichokes before and I have a serious phobia of deep-frying at home. There is really nothing like peer pressure and trying to recreate a meal from my travels to make me lose my head.

The good news is that I learned to trim artichokes. The bad news is that dropping artichokes covered in lemon juice into hot oil resulted in an oil explosion and the biggest mess my kitchen has ever seen. I was lucky my oil didn’t inflame! So, kids don’t try this at home. I ended up with a burnt artichoke and half an hour of degreasing my stove, counter and floor. So the story of “Helen conquers her fear of deep-frying and learns to cook artichokes to bring back the taste of Rome” turns into “Helen almost sets her kitchen on fire in spite of having the guidance of 3 recipes.” Good thing I made some gnocchi with roasted tomato sauce. They made a good comfort food dish after the artichoke disaster.

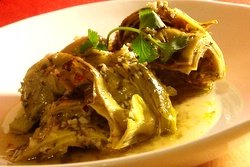
But I was determined not to give up on artichokes. I got some more the next day and decided to braise them. By now, I was getting pretty good at trimming them (I went through a lot of artichokes this weekend) and this time the cooking was less dramatic. I poured a little oil into a hot pan, added artichokes, garlic, parsley, lemon zest, juice and water. Then covered the pan and cooked on low for 10 minutes. This time, the artichokes were quite decent, but not much better than the canned. So I am still on a search for a great artichoke recipe. If you know of one, please let me know.

My other cooking experiment involved making pissaladière (a Provencal pizza with caramelized onions, olives, and anchovies). For the first time in my life, I botched up the toppings, not the dough. I am still in shock about it. For the dough, I used Reinhart’s recipe for focaccia and it turned out extremely well, but by the time the dough was done, the toppings got a little burnt (anchovies got particularly nasty). Of course, getting a recipe would probably be a good idea, but who thought you’d need a recipe for toppings!

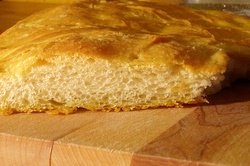
Luckily, I saved half of the dough and made a regular focaccia with it tonight. It was unbelievably close to what I had in Liguria.

We put some fig jam, prosciutto, cheddar, and leftover caramelized onions inside and made grilled sandwiches that were so good, they redeemed all the weekend’s disasters.

Sometimes, leftovers simply taste good, and sometimes they give you a second chance.