Thursday, November 30, 2006

Borsh (or Borsch, or even Borscht if you need a few extra consonants)

Borsh is one of the dishes most misunderstood by Americans. On this side of the Atlantic, it is known as a flavorless pink liquid that comes in a jar. I am not sure how this diluted beet juice started being sold as borsh. Where is the beef stock, the potatoes, the cabbage, the carrots, the onions, the garlic, and the tomatoes? Where is the taste?

Now the spelling... The most reasonable way to transliterate "Борщ" is "Borsh." What are all those extra consonants doing in the English version is a mystery to me. Maybe they are trying to compensate for something.

My regular cooking is mostly Mediterranean. But the chilly fall air has been giving me craving for a pot of good Russian soup. When I told my Mom that I made Borsh, she was surprised. "With all your sophisticated cuisine you have a craving for Borsh?!" After I spent 2 days making my fabulous Borsh, I was shocked that someone would think it's not sophisticated. "Who are you calling unsophisticated? Just because you can do it with your eyes closed, doesn't mean it's not a complex dish. Bouillabaisse is a piece of cake compared to Borsh!" Ok, so maybe I was getting carried away there, but a good Borsh has layers after layers of flavor and it does take longer to cook than Bouillabaisse.

Making Borsh is not hard. It's not like testing fish or steak for doneness and catching a perfect split second when it's just right. The most important cooking skill you have to have is patience. Borsh is super slow food and you can't rush it. Before I give you a recipe, let me explain the basic principle of Russian hot soups. First you need to make a stock, chill it and degrease it. Since a big pot of stock takes a while to chill, you do this a day in advance. Can you use store bought beef stock? Sure you can. But if you want the real thing, you have to make it yourself. Besides if you use store bought stock, you won't get nice tender pieces of beef in your borsh.

When your stock is made and degreased, you return it back to the heat and start adding vegetables. Potatoes and carrots go in first since they cook the longest, cabbage goes in next. There is a little controversy over when to add the beets. Traditionally, whole beets go in first (before the potatoes and carrots), they are then removed, shredded and returned to the soup. A trick I learned from my Mom, whose Borsh is the best I've ever had, is to wrap beets tightly in foil and bake in the oven until tender. Then shred them and add to the soup towards the end.

The final and most important touch, without which no Russian soup is complete is the carrot-onion flavoring. This is Russian mirepoix that appears in almost all savory hot dishes -- diced onions and shredded carrots cooked slowly in fat. For most dishes a mix of Sunflower seed oil and butter is used to cook them, but for Borsh nothing beats bacon fat. You finish this mixture with a can of tomatoes, tomato paste, and a ton of garlic. Then stir it into your soup and phew -- you are done!

It's very important to season your Borsh very generously. This is not the time for a little timid salt shaker. You have a ton of liquid here, so you'll need a ton of salt (if you want it to taste good). If you are making borsh for the first time, pour yourself a little bowl and start adding salt a pinch at a time. Taste the soup after each pinch and don't stop until the soup tastes "salty." Now remember what it tasted like right before that last pinch that tipped it over the edge. That was "perfect seasoning." Now try it with the whole pot, but stop at the "perfect seasoning" stage instead of going all the way to "salty." You'll need to add spoonfuls rather than pinches since a pot is large, but switch from tablespoons to teaspoons when you get towards the end.

Borsh (with fewer letters and more flavor)

Serves 10

For Stock:
3 large marrow bones
1 Lb beef (chuck or sirloin tips)

For Soup:
3 medium beets, trimmed and well washed, but not peeled
3 medium red skinned potatoes, peeled and cut into 1/2 inch dice
2 medium carrots, peeled, cut into quarters lengthwise, then thinly sliced
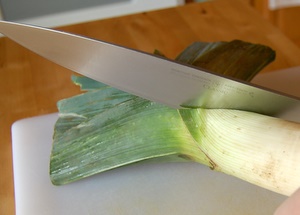
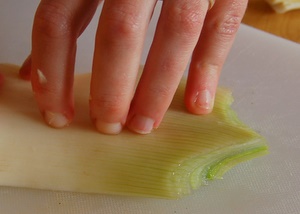
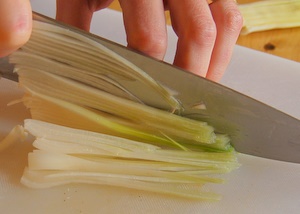
1/4 head cabbage, finely shredded
1 bay leaf
1 tsp whole black peppercorns

For Flavoring:
3 bacon strips, cut into 1/2 inch pieces
2 large yellow onions, finely diced
2 Tbsp sunflower seed (or olive) oil
3 medium carrots, shredded
1 can of crushed tomatoes, drained
1 Tbsp tomato paste
5 garlic cloves, very finely minced

For Garnish:
Sour cream
Dill and/or parsley, finely minced

Stock (prepare a day in advance):
  1. Place beef and bones in a large stock pot and cover with 5 quarts cold water.
  2. Cover and bring to a boil. As soon as the water boils, uncover and turn down the heat so that the liquid is simmering gently.
  3. Simmer for 3 hours, periodically skimming the brown foamy scum from the surface with a large spoon during the first 20-30 minutes of simmering or until no more impurities rise to the top.
  4. Chill the stock overnight. The fat will rise to the top and solidify. Remove it before making the soup.
  5. Remove and discard the bones.
  6. Remove the beef, cut it into rough chunks (about 1/3 inch big) and return to the stock.
Soup:
  1. Preheat the oven to 375F. Wrap each beet tightly in aluminum foil and place on a backing dish (don't place directly in the oven as they might leek). Place the dish with beets in the oven and roast until tender. This can take anywhere from 1 1/2 to 2 1/2 hours depending on the size of your beets. After the first 1 1/2 hours, pierce your beets (right through the foil) with a knife. Beets will never feel as soft as potatoes, but when they are done, you shouldn't feel much resistance. If beets are not done, roast them longer. Then cool, rub the skin off with your hands (it should come right off), and shred on a box grater using large holes.
  2. Once the beets are out of the oven, set the stock over on the stove top and bring to a simmer. Season to taste with salt.
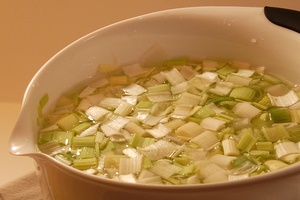
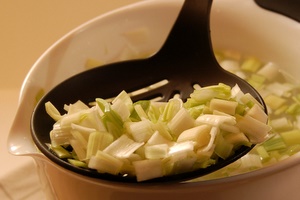
  3. Add potatoes and sliced carrots. Simmer until potatoes are tender when pierced with a knife, about 20 minutes.
  4. Add the cabbage, bay leaf, and peppercorns. Simmer until cabbage is tender but not mushy, about 20 minutes. While the vegetables are cooking, make the flavoring.
Flavoring:
  1. Set a large skillet over medium heat. Add the bacon and fry until the fat is rendered and the bacon is starting to turn crispy, stirring occasionally.
  2. Add the onions and a generous pinch of salt, turn down the heat to medium-low and cook stirring occasionally until onions are tender and golden brown, about 15 minutes. If the onions are sticking, add more oil.
  3. Add the shredded carrots and 2 Tbsp oil and continue to cook stirring occasionally until the carrots are tender and starting to brown, 15-20 minutes.
  4. Add drained tomatoes and tomato paste and cook until the mixture thickens slightly, 5-10 minutes. Take off heat.
  5. Stir in the garlic. Taste and correct seasoning.
Finishing the soup:
  1. Add the shredded beets and their juices to the soup.
  2. Add the carrot-onion flavoring to the soup.
  3. If the soup turned out too thick, add a little water. Stir well and take off heat.
  4. Taste and add more salt if needed.
Serving:
  1. Pour into bowls, add a dollop of sour cream and a sprinkling of dill/parsley.
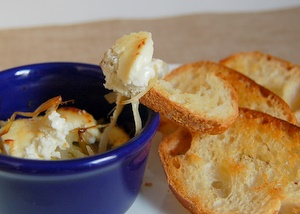
  2. Serve with good crusty bread rubbed with garlic and toasted. To make the toasts, cut a garlic clove in half, dunk in salt and rub all over the bread's crust. Then toast in a hot skillet on both sides with a couple of teaspoons of melted butter until golden and crispy.
  3. Instruct your guests to mix the sour cream in thoroughly with the soup. It looks pretty as a little snow pile on top of a steaming soup, but is not meant to be eaten that way. The reason we don't add sour cream into the pot is that it will curdle when the soup is reheated.
  4. Warn your guests about whole black peppercorns. I find it to be a nice spicy surprise when I bite into one, but not everyone agrees with me.
As any soup or stew, Borsh reheats beautifully and keeps well in the fridge for up to 5 days.

Wednesday, November 29, 2006

Salmon Cucumber Rolls

It was so cold and dreary last night that I decided to head to the closest possible fish market -- "Fishmonger" in Huron Village. In spite of it's convenient location, I don't go there more than a couple of times a year due to their early closing hours. But now that I work from home, I decided to seize my chance and see what they were up to. The shop is small and very quaint, the fish quality is excellent, the prices are sky high, and selection is limited. Yesterday's options were:

Dover sole for $30/Lb
Bay scallops for $38/Lb
Swordfish for $16/Lb
Lemon sole for $12/Lb
Cod for $12/Lb
Salmon for $12/Lb

I really wonder how much dover sole and bay scallops they sell at those prices. I realize, of course, it's Huron Village, but still. I didn't feel like swordfish, cod, or sole, and found myself in the same boat as most of my readers -- nothing but salmon looked good. So why not salmon? With my pound of salmon in hand, I was trying to decide what to do with it while wondering through Formaggio's Kitchen, a shop next door. Formaggio's Kitchen is a foodie's Disneyland -- it's one of those places that makes me happy no matter what the weather is like outside. There are at least 10 interesting cheeses laid out for tasting, shelves of French honeys and preserves, ridiculously old and ridiculously expensive balsamic vinegars, and a meat counter packed with salami, pates, hams, and foie gras.

Suddenly, I felt like pasta -- maybe it's because I made it to the pasta shelf. I picked out a box of tagliatelle, then a little bag of sorrel from the herb section and headed home.

I poached salmon, made a pesto out of lemony sorrel and tossed it with cooked pasta. As always, I enjoyed pasta more than salmon. No matter how many times I tried warm poached salmon, it just doesn't rock my boat.


But it does have one redeeming quality -- it makes the best leftovers. Chilled poached salmon is one of the best foundations for appetizers. Perfect served whole with a little Dijon mustard, mashed into a pâté, or made into fish cakes. But since I had a leftover English cucumber in the fridge, I decided to turn it into salmon cucumber rolls for today's lunch. What a perfect and simple hors' d'oeuvre it made!

Salmon Cucumber Rolls

Note:
If you don't have salmon leftovers, follow salmon poaching directions in salmon pâté. No need for orange juice and maple syrup in the poaching liquid. Just use half white wine and half water with a bay leaf and a teaspoon of whole peppercorns thrown in if you have them. The depth of liquid in your pan should be the same as the thickness of your fillet.

Fish substitutions: You could make the same dish with any fish leftovers that aren't too dense (so no tuna, swordfish, or mahi). Other than that, anything goes.

Serves 4 as an hors' d'oeuvre

1/2 Lb Salmon leftovers
1/4 cup finely sliced scallions
2 Tbsp sour cream or thick Greek Yogurt
2 Tbsp mayo
1 tsp Dijon mustard (optional)
1 English cucumber
Salt and pepper to taste
  1. Remove skin from salmon, flake it, and mix with scallions, sour cream, mayo, salt and pepper to taste.
  2. Cut the cucumber in half crosswise, so that it's not as long. Slice it lengthwise into very thin slices using a mandolin or adjustable blade slicer. Don't try to do this by hand. You'll have to discard the first few slices since they'll be just skin. When you make your first real slice, stop and test it out with the filling. If it doesn't roll nicely, adjust your slicer to make even thinner slices.
  3. Spread 1 Tbsp of filling on a cucumber slice leaving 1.5 inches empty on one side. Roll up the cucumber slice from the filled end to the empty end.
  4. Arrange cucumber rolls on a plate right next to each other. This will prevent them from unrolling.
Do ahead note: If making this dish for a party, you can make the salmon filling and slice the cucumbers several hours in advance. Then assemble shortly before serving.

Friday, November 24, 2006

Turkey worth eating -- even for fish lovers

I wish I had a picture of a turkey that Gaia and I cooked for Thanksgiving. But in the craze of finishing up the side dishes and carving our beast, we forgot all about the pictures. I’ll just have to do with a turkey leftovers sandwich for this post. I never thought a day would come when I'd be excited to write about a turkey. As you might have noticed, poultry is a rare guest on my blog. Nothing against birds, but my enjoyment of them is directly proportional to the fat content. Bird number 1 is duck – fatty, gamey, and as Julia Child would say “perfectly delicious.” But eating this heart attack on a stick on regular basis is probably not a good idea. Bird number 2 is chicken – I mean a whole roasted one (the breasts are just a vehicle for sauce). This puts turkey on the bottom of the list as number 3 – it’s too lean, characterless, and the way most people cook it, comes out dry. I like everything about Thanksgiving – the stuffing, the cranberry sauce, sweet potatoes, and pies – except for the turkey.

But to every rule, there are exceptions. In this case, it’s my Mom’s turkey. I’ve only had her turkey a few times, since we rarely get to spend Thanksgiving day with my parents. When you live far from your family, you have to do holiday rotations. I don’t mind – New Years is a much yummier holiday to visit anyway. But the few times I got to try my Mom’s turkey, I was just floored at how good it was – crispy skin, fall of the bone dark meat, and most surprising of all, juicy breast. This year, I finally got to learn all her secrets. We were doing Thanksgiving here in Boston with our friends Gaia and Jerome and for the first time in our lives, Gaia and I were responsible for the turkey.

“Ok, what do I do? I need the gory details,” I told my Mom on the phone. As if feeling the responsibility for the success of our first Thanksgiving, my Mom tried her best to recall the magic she does only once a year. Here are the notes from our conversation:

* * *

You’ll need a turkey roasting pan with a lid. No need to buy an expensive one. The enamel black ones (with white dots) sold at every supermarket for $20 work great.

Get 1 small turkey (10-12 Lb). This will easily serve 12-15 people. Let it sit at room temperature for an hour before cooking.

Combine 1 stick of butter at room temperature with a generous pinch of salt, 2 mashed garlic cloves, and 1 Tbsp minced herbs (rosemary, sage, thyme, parsley, or whatever you have). Mash with a fork until the herbs and garlic are evenly distributed.

Stick your hand into the neck of the turkey. Slowly and gently pry the skin away from the breasts. Be careful not to tear the skin. This is easier than it sounds. Spread the butter mixture under the skin all over the breasts.

Pin the neck skin to the back of the turkey with toothpicks. Rub the turkey all over (outside and inside) with salt and pepper (you’ll need about 3 Tbsp kosher salt). Sprinkle a little salt and pepper over the turkey’s neck too (it’s usually included inside the turkey). Tie the legs together with kitchen twine.

Place 3 whole carrots and 3 celery stalks into the bottom of the roasting pan to make a sort of “rack.” Place the turkey onto the vegetables. Add the turkey neck into the roasting pan next to the turkey. The neck is my favorite part. It’s a perfect crispy treat for the cook while the turkey is resting. Spread out the wings and wrap foil around the wing tips to protect them from burning. Not tucking the wings under (as is traditionally done with birds) lets them get crispy and develop more flavor. Cover the roasting pan with a lid. If the lid is touching the turkey breast, place a piece of parchment paper on the turkey breast before covering to make sure the lid won’t stick to the breast.

Preheat the oven to 450F.

Place the covered turkey into the preheated oven. Cook for 40 minutes.

Meanwhile set a small saucepan over medium-low heat. Add 1/2 cup dry white wine and 1 stick butter. Heat until butter melts. Take off heat.

Uncover the turkey (and remove parchment paper off its breast, if using). Turn down the oven to 400F. Continue roasting the turkey for another 2 hours, basting every 15 minutes with melted butter-wine mixture. Don’t bother with the squirty basters. Just use a spoon and pour about 1/4 cup of butter mixture all over turkey. When you run out of melted butter, continue to baste with the juices that start accumulating in the roasting pan.

Since the breast will stick out of the dish, it will start to brown before the legs. If this happens, loosely cover the breast with a piece of foil. But make sure to lift the foil when basting.

The turkey is done when it’s nicely browned all over, the juices run clear when you pierce the thigh, and the dark meat feels very soft. If the dark meat is done, the breast is definitely done since it cooks faster. It’s best to err on the side of overcooking. There is enough butter in the basting juices that the turkey won’t dry out, and the dark meat tastes best when it’s REALLY done. That’s why I have such a hard time with turkey – it’s exactly the opposite of cooking fish.

When the turkey is done, take it out of the oven, and let it rest 30 minutes before carving. Strain the juices into a glass measuring cup or fat separator. Let sit for 5 minutes while snacking on the turkey neck. Skim the fat off the turkey juices. Pour the juices into a large skillet with 1 cup turkey or chicken stock and 1/2 cup dry white wine. Boil over high heat until slightly reduce (about 5 minutes). In a small bowl, combine 1 Tbsp softened butter with 1 Tbsp flour and mash into a smooth paste. Turn down the heat under the turkey juices to medium-low and add the flour-butter paste, mixing vigorously with a whisk until no lumps remain and the gravy thickens. Carve the turkey, and serve with the gravy.

* * *
Gaia and I followed these instructions to the letter. We stuffed, we rubbed, we roasted covered, we roasted uncovered, and we basted, and basted, and basted some more. How was it? Simply spectacular! Better than duck? Oh come on, nothing can be better than duck, but if you are going to cook a turkey, you might as well make it taste good.

If you are anything like us, you'll fight over the dark meat and save the breast for leftovers. Reheating turkey or chicken breasts would be a mistake -- they dry out too quickly. Better slice them up for sandwiches or dice and toss with canned tangerines, herbs, thick Greek yogurt (or mayo) and Dijon mustard for an awesome salad. The sandwich possibilities are endless, but the one in the picture is with bacon, apples, avocado, red onions, and aioli (mayo with a little mashed garlic and lemon juice).

Monday, November 20, 2006

Beyond Salmon Turns 1!

No, I did not forget my blog’s birthday. It turned 1 years old on October 8th. This last year brought some great changes in my life, and I was just waiting for the right time to share my big news with you. Last week, I quit my software job to devote all my energy to teaching cooking classes. Although this blog did not directly make it happen, it contributed quite a bit. I’d like to dedicate this post to you my readers. Thanks for your curiosity, desire to learn about new cooking techniques, willingness to try new ingredients, and most of all for helping me find my true calling. How did this whole thing happen? To answer this question, I have to backtrack to the depressing day of October 8, 2005.

I opened yet another rejection letter from a literary agent. After spending a year doing research for my fish cookbook and polishing my proposal, I realized that it was all for nothing. There were over a 100 fish cookbooks already on the market, I was a no name adult ed cooking instructor without the slightest clue of how to make fish cooking (or any food writing for that matter) into a sexy page turner the agents wanted. Whom was I kidding? This fish book was never going to happen.

The problem was what to do with all my fish research? I was hoping for a wider audience than my One Fish, Two Fish, Red Fish, Blue Fish classes and no number of rejections was going to stop me. That is how Beyond Salmon blog was born. I just couldn’t let the chapters on Doneness, Fish Personalities, and Buying Fish go to waste.

To tell you the truth, I was relieved the book didn’t work out. Writing was always hard for me and it happened more naturally on my blog, without the pressure of a cookbook. Instead, I decided to concentrate on something that was easy and pure fun – teaching. I’ve been teaching at the Cambridge Center for Adult Education for several years, and had toyed with the idea of starting my own little cooking school. It always felt like some sort of fantasy that might happen in some far future. But after coming across the Culinary Communion Cooking School in Seattle, I thought “Why not here in Boston?” This would be a cool thing to do when Jason finishes his Ph.D. and I would be able to take a year sabbatical from the software industry. But my impatience got the best of me, and I couldn’t help starting to investigate what it would take. According to the state of Massachusetts and the Town of Belmont, I wouldn’t need a commercial kitchen required for caterers and restaurants (none of the adult ed places had ones either). When you are selling an educational service and not a food product, the regulations are less stringent. All I needed was liability insurance. A few calls later, I got a number of quotes, and realized that it’s not such big bucks after all. With a little nudging from Jason, I got the insurance, put up a website, and by January 1, 2006 Helen’s Kitchen was opened for business.

But as I was waiting for the customers to call, guess who called instead? A literary agent. She loved the Fish Personalities chapter and thought this book had potential. But after a few phone conversations and sleepless nights, I realized that our visions for this book were very different. Since the book wouldn’t have any photography, the agent wanted at least 200 recipes to give the book some weight and make it look like “you could really cook from this thing.” I didn’t think it was the lack of recipes that was stopping people from cooking fish. Just do a search on epicurious. The real road blocks I kept hearing about in my classes were not knowing how to buy it, how long to keep it, how to test it for doneness, and how to substitute one fish for the other.

The whole reason I wanted to leave the corporate world was my inability to bend to the will and vision of others. I knew what I wanted to do with this book, and if that’s not what the cookbook industry wanted, so be it. I was perfectly happy with my blog. Yes, I know, it looks a little backwards. Most food writers start with a blog and upgrade to a book, and I started with a book and downgraded to a blog. That’s how I realized that professional food writing is not something I could ever make a career out of. Plain old writing was hard enough, but writing on demand was simply impossible for me.

Meanwhile, the calls for Helen’s Kitchen started to come in. Having a blog gave me more web presence, which meant higher Google rankings. Some people would sign up for classes because they found my blog. Others would take a class and then start reading the blog. So between Google, Blog, and word of mouth, I found myself teaching several times a week.

This didn’t leave much time for sleeping or having a life. All my “free” time was spent teaching and staying up till 1am to blog. That’s when I realized that something had to give. After a few months of thinking and weighing my options, I decided to leave my office job. Am I making enough money with cooking classes to replace my salary? Yeah, right! But I am loving every minute of it.

Sunday, November 5, 2006

Technique of the Week: How to Work with Leeks


Leeks are some of the most elegant onions -- tall, slender, and subtly sweet. But elegance does not come with cleanliness. I don't know what these leeks do while they are in the ground, but they manage to pack a good layer of sand nice and tight between their leaves.

How do you avoid getting all that grit into your dish if you can't get it out from between the inner leaves? You work backwards -- first you chop and then you wash. Here is a step by step guide to working with leeks.

Cut off the dark green leaves, leaving only the white and pale green parts.


Cut off the root end.

If the leeks look really dirty, peel one layer off the outside, and rinse the leek under cold running water to remove any visible dirt. Typically, this is only necessary for the leeks you buy directly from the farm since the supermarket leeks are partially cleaned.

Cut the leek in half lengthwise.


Cut of the root on a diagonal to help the layers separate once leeks are sliced.


I find that the leek layers can shift during slicing, making your knife slip. Here is one way to prevent this.

Take out the core of the leek.


Flatten the outer leaves by pressing on top with your fingers.


Using the claw grip (curved fingers and tucked in thumb). Slice the outer leaves, then slice the core separately.


If you want your leeks diced, repeat the slicing step going perpendicular to your original direction.

Now the washing part -- put the leeks in a large bowl of cold water and rub vigorously with your hands to separate the pieces and loosen the sand.


Wait 2-3 minutes for the sand to settle on the bottom of the bowl. Then scoop the leeks out with a slotted spoon without stirring the water. The goal is to NOT disturb the sand that settled on the bottom of the bowl.


Pour out the sandy water, rinse the bowl, and repeat this procedure until the water you discard is sand free. Typically, it takes 2 rounds.

Your leeks are now ready to be used.

Cooking leeks:
I cook leeks the same way for all my recipes. For 2 leeks, melt 1 Tbsp of butter and 1 Tbsp olive oil in a large pan over medium heat. Add the chopped and cleaned leeks, 2 Tbsp dry white wine, and season with salt. Cover, and cook, stirring occasionally, until leeks are tender, about 10 minutes. Uncover, and continue to cook, stirring occasionally, until leeks are just starting to brown, about 5 minutes. Since leeks vary in size, it’s hard to give exact measurements for oil and butter. If your leeks start to stick, add a little more oil or butter (butter tastes better, but oil is fine if you are watching your cholesterol).

We've been getting tons of leeks lately in our farm share. Here are some things that I've made with them:


Leek and Goat Cheese toasts -- these are fun to serve as an appetizer, a snack, or to accompany any fall soup. Lightly butter baguette slices on both sides (any good rustic bread works as well). Spread cooked leeks on baguette slices and top with goat cheese (I used mild and creamy Montrachet). Toast in the oven at 450F until the bread browns and cheese melts, 5-7 minutes.


If you are a dunker, you can pile the leeks into a broiler-proof ramekin, top with a mix of goat and mascarpone cheese and broil until bubbly and lightly browned. Serve with toasts.


Leek and Pumpkin Quiche -- kind of like a savory pumpkin pie. I spread diced cooked leeks in a pre-baked tart shell, and poured in a savory pumpkin custard. For the custard, I started with the quiche mix from Papaya Pâté blog, and stirred in a cup of baked and mashed pumpkin (canned pumpkin will work too). Then finished baking according to Papaya Pâté's instructions.

Potato Leek soup -- it's a classic and perfect for fall. You can use my potato fennel soup recipe, substituting leeks for fennel and following the above instructions for cooking the leeks.