Wednesday, January 31, 2007

Vinegret

If you are a regular reader of this blog, you probably got so used to my misspellings, that you are thinking that I've even managed to misspell a title of a post. Ha-ha! Gotcha -- this time I did it on purpose. In Russia, "Vinegret" refers to the beet salad known as "Russian Salad" here in the US. Believe it or not, this salad is composed of about 30% beets and 70% other veggies, but you'd hardly notice by looking at it -- the beets have a way of dying everything magenta. I can't seem to find any information on the origin of this salad or its name. I am guessing that the name is the Russian spelling of the French "vinaigrette." This salad is in fact dressed with a vinaigrette type dressing used for many Russian salads, but in Russian, the word "Vinegret" refers exclusively to the salad made of beets.

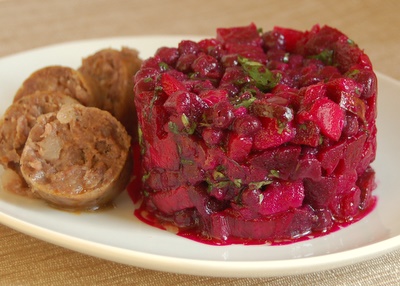
I don't normally take pictures or write about what I make for lunch, but this salad came out so well, and the light in the kitchen was so wonderful that I decided to take a picture and post about it. I served it with the wild boar sausage that I got at Formaggio Kitchen on my way home from the gym. Good thing I don't stop by this store every time I go to the gym or it would defeat the purpose of exercising :)

I couldn't help laughing while stuffing this colorful salad into my ring mold. In Russia, this is as casual as food gets. You put a huge bowl on the table with some pumpernickel bread, butter, and herring (or sausages), and that's all the food styling this salad normally gets. But what won't an obsessed food blogger do to make it look more sexy for her readers?

Vinegret

Note on ingredients: Traditionally, cooks in Russia make this salad with canned peas. I find them really mushy and prefer to use frozen peas instead. I have also never heard of anyone using lemon juice to dress this salad. People either use vinegar or skip the acid ingredient all together. But although authenticity of my vinegret is questionable, the taste is not :)

Serves 4-6

For the salad:
2 medium beets (about 3" in diameter), washed, but not peeled
2 medium red-skinned potatoes (~ 3" in diameter), washed, but not peeled
1 large carrot, washed, but not peeled
1 large yellow onion, finely diced
2 large kosher dill pickles, finely diced
2 cups frozen peas

For the dressing:
2-3 Tbsp juice from pickles, or to taste
2-3 Tbsp freshly squeezed lemon juice, or to taste
1/3 cup sunflower seed oil (or olive oil)
Salt and black pepper to taste

For serving:
1/3 cup chopped cilantro, parsley, or dill
  1. Put beets, potatoes, and the carrot into a large pot, cover with cold water generously seasoned with salt, cover with lid, and bring to a boil. Reduce heat to medium-low, partially uncover, and simmer until the vegetables are tender, but not mushy. They'll have to be removed from the pot at different times. Test them by poking with a sharp knife. After the water comes to a boil, the carrot takes 20-30 minutes, potatoes take 30-40 minutes, and the beets take about an hour. Note that the beets never get as tender as potatoes, so if the knife pierces them relatively easily, they are done.
  2. Cook peas in boiling water just until defrosted, about 2 minutes. Drain and rinse with cold water to cool.
  3. Cool and peel the beets, potatoes, and carrot. Their skin will slide of pretty easily, so you don't need a peeler. Use a pairing knife for potatoes and carrot, and rub the beets with your hands to get the skin to slip off them.
  4. Cut all boiled vegetables into small dice and mix with onions, pickles, and peas.
  5. Dress the salad with pickle juice, lemon juice, sunflower seed oil, plenty of salt and pepper. Taste and adjust seasoning. Ideally, let the salad sit in the fridge overnight or at least for a few hours to let the flavors blend.
  6. Before serving, stir in cilantro, dill, or parsley. I like to drizzle each plate with a little more sunflower seed oil -- it's so good, I never seem to get enough of this stuff.

Monday, January 29, 2007

How to Travel with a Snapper

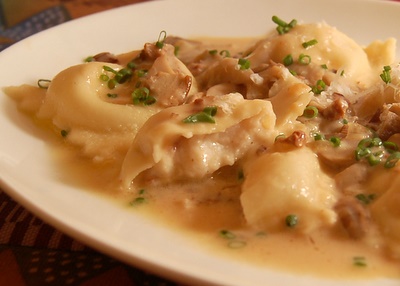
The moment Jason turned in his thesis last Wednesday, we got into our car and drove to Portland, ME. We spent 2 wonderful days sitting by the fire in our B&B, reading New York Times (I forgot how fun it is to read it on paper vs. on the monitor), and having the best meal of this year at Hugo's. It's our third time there, and I thought that we'll finally start to get disillusioned. Will it be as good as we remembered? It never seemed to be for other restaurants of this caliber. But Hugo's never disappoints.

My heart sinks every time we go to Hugo's and find it empty. Sure, it was a Wednesday night, but the other places we went to on a weekday were much fuller even though Hugo's food is simply unbeatable. What surprises and delights me is not just the creativity, but the integrity of the food. When Rob Evens does something, it's not for the sake of novelty, but for the sake of unsurpassed taste experience. In fact, you can even call his food simple. Most dishes are both different and familiar at the same time, and you know that you'll suffer through too many cravings until the next time you return to Hugo's. Of course, by next year, he'll come up with something new and just as awesome. By my third time at Hugo's, I almost felt the time stop at some forkfuls. I knew that as each perfect bite melted in my mouth, its taste, like that moment, would be gone forever.

Somewhere between the last fish course -- scallops tartar with horseradish cream and puffed rice -- and the first meat course -- the juicy rabbit sausage wrapped in quail and topped with parsnip foam -- a faint murmur of "tuna... baramundi... sashimi" woke me up from my reverie. Two men and a woman sitting at the bar were talking about fish. One of them was in chef's whites.

You know how figure skating commentators like to call some athletes a "skater's skater." Well, Rob Evans is a cook's cook. I think you have to be a cook (not necessarily a professional) to appreciate his work and the guys at the bar seemed to know what they were talking about. It was too tempting not to stop by after our meal and meet them. Turned out that two of them were from another Portland restaurant and the third one was from the Brown Trading Company. What looked like chef's whites to me from the distance was Brown's uniform. The guy wearing it was Jason -- its manager. He supplies fish to most of the top restaurants not only in Portland but in other cities, and invited us to check out the store.


Friday morning, we were his first customers. I love it when I get greeted with "You guys want to taste some caviar?" After tasting 5 or 6 types, we finally found one that both Jason and I liked. It was sturgeon roe, farm-raised in France, and prepared in the Malossol (low salt) style. I never thought that I'll call $90 for 50 grams (about 2 oz) of anything reasonable. But for black caviar of this quality, it was actually a good deal, and to celebrate Jason being officially a doctor now, we decided to get a jar. And how could I leave without trying the fish! Bringing fish back from vacation is a little strange, even for me. But the drive to Boston is only 2 hours, and at 5F, I was more worried about the fish freezing in our trunk than going bad. But the guys at Brown packed it so well in Styrofoam that I had nothing to worry about. I got a whole snapper, a whole branzino, and some halibut fillet. The halibut wasn't the wild, east coast one that I am used to (this one was farm-raised in BC), but I haven't had halibut in so long that I decided to try it.

The fishies were all yummy and are already gone. I broiled the snapper and branzino with fennel and oranges. I can never cook almost anything the same way twice, but this one is one of my favorites and I like it so much, I can't bring myself to change it. If you want to know more about broiling, check out "Playing with fire," my recent article for Culinate.com.


We had so much leftovers that I decided to make fish cakes with cilantro lime yogurt sauce. The fish cakes are essentially my bluefish burger recipe without a bun, and cilantro lime yogurt sauce is exactly what it sounds like (mix of cilantro, lime juice, yogurt, a little mashed garlic, and a pinch of salt). Halibut got seared in duck fat and served with roasted potatoes. And the caviar is waiting for Valentine's day.

Monday, January 22, 2007

Meyer Lemons -- that's what's for dinner

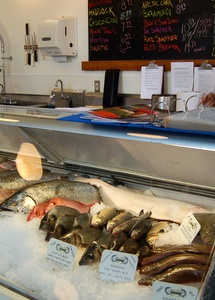
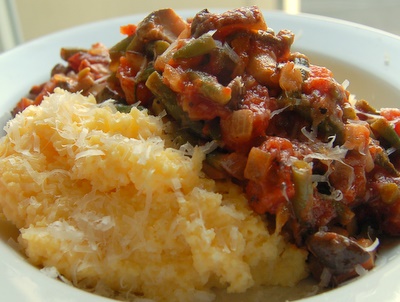
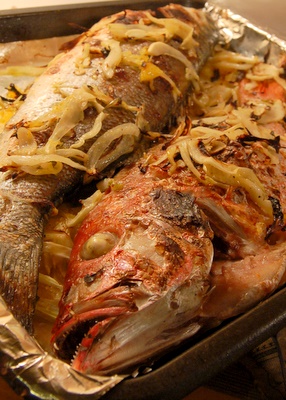
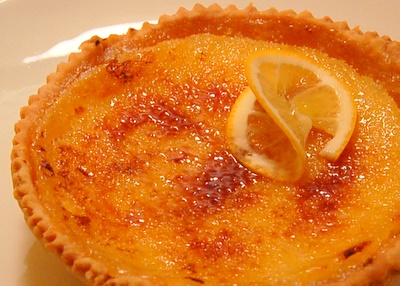
This Saturday, I've come to a conclusion that the most necessary tool in today's kitchen is not a KitchenAid mixer, a food processor, or a mandoline. It is, without a doubt, an internet connection. I never realized how much I rely on it until it was gone. After teaching for 3 days straight, and tidying up my kitchen after the last class, I was finally going to get to play with my beautiful meyer lemons. I got these little smooth beauties at Whole Foods a few days ago and couldn't get enough of them. I drizzled them over fish, put a slice in my tea each morning, and used them for salad dressings. They are a little sweeter and more perfumy than regular lemons and simply irresistable. I was thinking of dishes that would put meyer lemons center stage rather than use them as an accompaniment and came up with meyer lemon hollandaise sauce and meyer lemon tart.

I've never made hollandaise before since I am not a big butter sauce person. I wonder if I am the first culinary instructors who doesn't know how to make hollandaise with her eyes closed? With Julia Child's instructions, it was a piece of cake. To lighten it up a bit, I stirred in a bit of whipped cream and extra meyer lemon juice. As I found out, that would be called Sauce Maltaise if I used orange juice. Was it yummy? Well, how can this much butter not be yummy? But to tell you the truth it wasn't any yummier than my regular fish reduction with a touch of cream, which is about 75% less fat than hollandaise.

The lemon tart is where I really got stuck. I remember seeing a recipe for a lemon tart with a torched top, but for the life of me couldn't remember where. I looked through the recent issues of Gourmet and Saveur with no luck. It must have been someone's blog. Oh yikes -- our internet connection was still dead, and verizon people were impossible to reach on a weekend. I started looking through my cookbooks to see what I could find. Julia's book had a lemon soufflé tart, but I was looking for more or a custard tart. The only one I found was in Jamie Oliver's book, and he and I are not the best of pals. Well, actually, I am sure Jamie is a great guy, but whoever writes and tests his recipes drives me nuts. I remember making this tart years ago and not being happy with it.

You'd think it would be wise to wait till I could find a good recipe. But when one needs a lemon tart, one needs a lemon tart. I even had a perfect little piece of pâte brisée (tart dough) left over from my French Bistro class. I collected the edges of the dough after trimming a tart tatin, and put them back in the fridge. It was just enough for one tartlet for Jason and me to share after dinner and the meyer lemons sitting on my counter made waiting simply impossible. So I decided to fearlessly plunge into this baking adventure with or without a proper recipe.

When I tried to remember what went wrong with Jamie's tart, I figured it was nothing that couldn't be fixed.
  • The dough sucked, but I had that already taken care of.
  • The lime zest looked cool in the picture, but it distracted from the creaminess of the custard. I decided to infuse the cream with the zest, but strain it out before using.
  • The custard cracked -- that might have been my fault. Maybe I baked it too long, or maybe my oven is hotter than I think it is. To be on the safe side, I decided to lower the temperature from recommended 350F to 325F.
Now that I had a plan for the custard, I just had to figure out how to bake a little tartlet without a tartlet shell. Here Julia came to the rescue. I have long wanted to try her method of baking tart dough on an inverted pan. I flipped my tiniest pyrex dish, arranged the dough on top and trimmed, then set a ramekin on top of the dish to prevent the dough from puffing up. After 18 minutes, I removed the ramekin and baked a couple minutes longer to make sure the bottom (which was actually on top) was done. It tuned out beautifully! Very evenly baked without all that foil, beans, etc. I popped it off the pyrex dish, put it back in the oven, filled with custard and baked until only the center was quivery. Then I cooled it for an hour, sprinkled with sugar, and torched the top like I do for crème brûlée.

It was a truly spectacular tart. The custard packed a good lemony punch. The dough was perfectly flaky and delicate. And how can you not love that sugar crust?


Meyer Lemon Tartlets


Serves 6

pâte brisée for 1 large tart divided into 6 parts, rolled out and baked.
3/4 cup heavy cream
2 Tbsp lemon zest (preferably meyer lemons)
2/3 cup freshly squeezed lemon juice (preferably meyer lemons)
4 large eggs
3/4 cup sugar
1/2 tsp vanilla
  1. Since the tart dough doesn't cook at all once the custard is added, cook it completely before proceeding to step 2. Follow instructions for rolling our and baking the dough, but add an extra 5-10 minutes to the baking time to make sure the dough is golden brown all over.
  2. Set the oven to 325F.
  3. Combine cream and zest in a small saucepan and warm up over low heat just until the mixture is hot. Don't let it boil. The easiest way to do this is in a pyrex measuring cup in the microwave. Take off heat and let stand 5 minutes. Strain out the zest and discard.
  4. In a medium bowl, whisk together the eggs and the sugar. Slowly beat in the cream, lemon juice and vanilla.
  5. Put the tartlet shells on a cookie sheet and set them in the middle of the oven. Pull out the oven rack, fill them with custard, and very carefully move the rack back in the oven. Cook just until all but the center of the custard is set, 30-40 minutes.
  6. Cool on a rack for 1 hour. Do not eat right out of the oven -- the custard will be too runny. If you have a torch, you can sprinkle the top with sugar and torch it.

Monday, January 15, 2007

The cutting edge

The Cutting Edge by Helen Rennie -- my first freelance food writing gig :)

Have you ever dreamed of being a food writer? If you have a food blog, I am 100% sure you have. If you don't have a food blog, I am only 90% sure you have. If you've never wondered what it would be like to be Ruth Reichl or Jeffrey Steingarten, you are probably reading this blog because you are related to me :) So, it wouldn't come as a surprise if I told you that for several years, way before the days of blogs, I dreamed of writing about food professionally.

I remember my first call to the editor of THE Paper (we'll leave the name of this paper anonymous). "I thought your readers might like a story on making flavored oils? No? Oh, ok... And how about...? Ok. Sorry to have bothered you." That was before I knew all about query letters and other such courtship rituals of professional writing. Then I tried writing for The Other Paper. Writers in Boston who get rejected by THE Paper write for The Other Paper. But hey, one has to start somewhere and when The Other Paper's editor replied to my query, I felt like I just got into Harvard.

They didn't want full stories, just a 150-200 word blurbs about what to eat in Boston. I'd spend days researching the places I was writing about, obsessing over every one of those 200 words only to find my stories completely rewritten to make them sound like catchy tabloids. It really got to me, when they changed the dishes I recommended for the other more "cool" sounding ones. They found those on the restaurant's website. I didn't have a chance to warn them about on-line menu being out of date because I only got to see the changes when the paper came out in print.

When I asked if they'd like some seasonal recipes, they said "Only if they come from a restaurant chef." I tried to explain that I taught cooking classes and they'd have a higher chance of getting a well-tested recipe from me than a restaurant chef who is not used to writing for home cooks. "But it's not like people actually cook this stuff," the editor said. "I am sure your recipes are good, but unless there is a well-known chef's name next to it, who'll want to read it?!"

That did it. I started this blog and swore off professional food writing forever. I only knew how to write about how to cook. I didn't know how to write about:
  • trendy ingredients ("have you tried pomegranate molasses yet?")
  • food orgasms ("the scallops melted in my mouth like a happy cloud on a spring day")
  • travel and history ("Jacques led me into the cellar of his Côte de Nuits château... ")
  • sex in the kitchen ("as I was finishing my 25th pound of onions, I heard the sous chef screwing the pastry chef in the walk-in")
I still don't know how to write that stuff. Don't get me wrong -- I love to read it, I just can't write it.

Since "how to cook" seemed to be a thing of the past, at least in the food literature, I decided to start Helen's Kitchen. To my delight, there were still people who wanted to learn how to cook, and they've been keeping me plenty busy this year. So when I got a call from Kim at Culinate.com, I was more than a little skeptical about yet another food writing opportunity. Kim told me that Culinate was not just about what's for dinner. Its goal was to take a closer look at food and its role in our lives. This wasn't volunteer work. They were looking for freelance food writers and called because they enjoyed my blog. I started to explain to Kim why they didn't want someone like me. But hey, if she was willing to give me a chance with no query letters, why not? I'll write something, they'll see for themselves that they don't want this stuff, and they'll leave me alone.

So I wrote something, and they asked if I want to do a column for them. What?! Were they crazy? It reminded me of Shrek. "Donkey, don't you see that I am a big ugly ogre? This is the part where you run away!" Kim and I spent two hours on the phone. I tried to tell her that I don't know how to be anything but myself, which doesn't seem to be very popular at the moment. Kim tried to persuade me that they actually want me for my "how to cook" content, and it doesn't have to be romantic or mouth-wateringly beautiful. "You mean I can write about stuff like how to buy and sharpen knives?" I asked. "Yes," said Kim.

Last week, my first story, "The cutting edge" went live. It felt a little strange and exciting to see my writing on another site. Do check it out, and while you are at it, see what Culinate is all about. You'll find out how to have a perfectly sharp knife with minimal work for $30 and why steeling your knives is not always a good idea in spite of what they tell you on Food TV and in cooking classes. Culinate even lets you leave comments, just like blogs, so if you want to share your own experience with choosing and sharpening knives, you can leave a comment in the end of the story.

Thursday, January 11, 2007

Polenta with Green Bean and Mushroom Ragu

There are two types of dishes in my kitchen -- the ones that I conceive and the ones that my leftovers conceive. I'd like to think that I am a pretty creative cook and am at least as good at this game as the little containers sitting in my fridge. But I have a feeling they go on long brainstorming sessions while sitting in the fridge for a day or two. I mean, if you were a leftover, how would you spend your time?

The leftovers today were sauteed trumpet mushrooms and uncooked haricot verts (the slender little green beans). The original plan was to toss them with buckwheat and caramelized onions until I realized that I ran out of buckwheat. I did find some polenta, and consulted my leftovers about this arrangement. They seemed to be pretty happy to go on top of polenta, but suggested adding some tomatoes and maybe even a little porcini stock to bring out the mushroom flavor. Luckily, I had some dried porcini mushrooms and couple of cans on Muir Glen tomatoes in my pantry. It sounded like a good plan, and I set to work stirring my pot of polenta and cooking the sauce. I wonder when KitchenAid or All-Clad will come out with a self-stirring pot. It would come in so handy. But polenta only takes about 30 minutes, so I can't complain too much. It must have seemed longer since I just got back from the gym and was starving.

Finally, the polenta got nice and thick, the beans got tender and it was time to eat. Yum! Those leftovers have some awesome ideas sometimes.


Polenta with Green Bean and Mushroom Ragu

Serves 4

All the mushrooms are optional. If you are not using dried porcini liquid, don't drain your tomatoes to end up with roughly the same amount of liquid.

For the sauce:
1/2 cup dried porcini mushrooms (optional)
12 oz mushrooms of your choice, sliced or quartered (optional)
3 Tbsp olive oil
1 yellow onion, finely diced
1 garlic clove, thinly sliced
8 oz green beans, snapped, and cut into 1 inch lengths
28 oz can of diced tomatoes, drained
2 Tbsp butter
Salt to taste

For polenta:
4 cups water
1 tsp salt
1 cup polenta
2 Tbsp butter
1/4 cup finely grated parmesan

To make the sauce:
  1. Put porcini in a little bowl and cover with 1 cup boiling water. Let sit 15-2o minutes while preparing the sauce.
  2. Set a large skillet oven high heat, add 1 Tbsp olive oil, fresh mushrooms, and a pinch of salt. Cover, turn down the heat to medium-low, and cook until tender, 5-7 minutes. Uncover, turn up the heat to medium-high, and cook stirring occasionally until golden brown, 5-7 minutes. Remove to a bowl and set aside.
  3. Add the remaining 2 Tbsp olive oil, onion, and a pinch of salt to the skillet. Turn down the heat to medium-low and cook stirring occasionally until onion is translucent and starting to brown, 8-10 minutes.
  4. Add garlic and green beans and cook stirring for 1-2 minutes until fragrant.
  5. Strain porcini liquid into a bowl through a strainer lined with paper towel to remove the sand. Add porcini liquid and tomatoes to the skillet with beans and bring to a simmer.
  6. Cover the skillet. How long to cook the sauce depends on how hungry you are. Ideally, turn down the heat to low and cook for 45-60 minutes. The goal is to get the green beans to be very tender. I know that mushiness is not normally a desired quality in the bean, but trust me on this one -- they are really good this way in tomato sauce. If you are as hungry as I was today, you might cut some corners, and crank up the heat to medium for 10 minutes and then medium-low for another 10. The beans won't get quiet as tender, but the sauce will thicken and be still very yummy in just 20 minutes.
  7. Right before serving, stir in the butter, add salt to taste, and take off heat.
To make polenta:
  1. Bring 4 cups of water to a boil.
  2. Add polenta in a steady stream stirring constantly with a whisk.
  3. Cook for 30 minutes, stirring constantly. As polenta gets thick, switch to a wooden spoon. If you like yours on the thinner side, add water a few tablespoons at a time as polenta thickens.
  4. Stir in butter and 2 Tbsp parmesan.
  5. Divide between 4 bowls, top with the sauce, and sprinkle with remaining parmesan.

Saturday, January 6, 2007

Technique of the Week: How to make pasta dough


Happy New Year, everyone! Sorry for being such a blog bum lately. Thanks to everyone who checked up on me to make sure everything was ok. The reason for lack of writing was that we were gone for two weeks during the holidays to visit family, and during our trip both Jason and I got sick. We are finally doing better, and yesterday I even cooked something :) The something was ravioli. I have this tendency to not get my act together with recipes until "Ta-da! Nick of time." During the drive back from Baltimore, I realized that I am teaching a pasta class this Sunday and I don't have my pasta dough recipe written up -- aaaaah, start panicking! The worst part was that I was barely well enough to make a soup, let alone pasta from scratch. I told myself not to panic, eat lots of chicken soup (I am never sick enough to make that ;), drink lots of tea, and rest. Luckily, by Friday, I was feeling well enough to spend a few hours in the kitchen testing the dough recipes. My dough experiments turned into some very yummy ravioli. Since I had some left over cannellini beans, I mashed them up in a food processor with a little cream cheese, then added some finely chopped prosciutto and sauteed onions for a killer filling. The first day I served them with a creamy wild mushroom sauce,

and the second day with Marcella Hazan's tomato, onion, butter sauce. Both were fabulous.


So, here we go -- how to make pasta dough...

Ingredients:
When it comes to any dish made out of dough, people like to have some mystique around the ingredients -- New York bagels are so good because of New York water, good baguette can only be found in France because of their flour, etc. I think it's all a bunch of BS, including the claim that you need Italian "OO" (double zero) flour to make good pasta. Yesterday, I made a batch of dough with OO flour and another one with all-purpose flour and there wasn't any difference as far as I could tell. And unlike Jamie Oliver, I used basic large eggs from Whole Foods instead of "the freshest organic ones straight from the farm." Really guys, don't fret about your ingredients -- it's all in the wrist! The only ingredient you might not already have in the house is semolina flour. I find it useful for sprinkling the surface that will fold the finished pasta, but all-purpose flour will work too.

For 4 main-course servings of pasta, you'll need:

9 oz all-purpose flour (2 cups spooned and leveled)
2 tsp kosher salt (or 1-1/2 tsp table salt)
2 large eggs
1-3 Tbsp cold water
1 tsp olive oil
Semolina flour for sprinkling finished pasta

Measuring:
This is important and trickier than you think. Flour and eggs are very difficult to measure. The only real way to measure flour is by weighing it (which, unfortunately, is not a popular method in the US). Measuring it with a cup can give you as much as 25% difference between cooks. If you must use a cup, see the tart dough technique on how to measure flour. Eggs are not very consistent either. Even the ones in the same box can be a little different. To deal with these irregularities, I suggest you break the eggs into a glass measuring cup and add enough water to give you 1/2 cup of wet ingredients. Eventually, you don't have to obsess about measurements. You'll be able to judge based on the feel of the dough, but if this is your first time making fresh pasta, accurate measurement is the easiest way to get the right consistency.

Equipment:
Theoretically, you can make pasta with nothing more than a fork and a rolling pin. I just don't think it's such a good idea. It's a labor intensive process, and there is a lot of technique to worry about, so I suggest you employ the following equipment:
If you are making ravioli, you'll also need a pastry wheel or a ravioli maker.

Technique:

Stage 1: Integrating wet and dry ingredients
  1. Put flour and salt into a food processor bowl and process for 10 seconds.
  2. Put eggs into a glass measuring cup. Add enough cold water to make 1/2 cup (about 1 Tbsp water). Add the wet ingredients and 1 tsp oil to the flour in the food processor.
  3. Turn on the processor and mix until ingredients are evenly distributed. Mixture will be sandy and crumbly.
  4. With the processor running, add another 1 Tbsp cold water through a feed tube. At this stage the mixture should start coming together into a ball. If you are not getting a ball after 30 seconds of mixing, open the processor and squeeze a chunk of dough with your fingers. If it comes together and feels like play dough, it's done. If not, restart the processor and drizzle in a little more water, 1 tsp at a time.
Stage 2: Kneading
Turn the dough out onto a work surface and gather into a ball. Knead for 8 minutes. The dough should be soft, pliable, and slightly tacky, but not sticky. It should not stick to the work surface or your hands. If it sticks, add a little flour and continue kneading. Don't short cut this step. Kneading is what develops gluten and makes your dough elastic and workable later.

Stage 3: Resting
Wrap the dough tightly in plastic wrap and refrigerate for 1-8 hours.

Stage 4: Rolling
  1. Cut the dough into thirds. If you doubled the recipe, cut it into sixths. Work with one piece of dough, while keeping the others tightly wrapped in plastic -- dough dries out quickly.
  2. Set the pasta roller to the thickest setting. Flatten out a piece of dough. Sprinkle it with flour and shake of excess. Put it through the pasta roller. Fold it into thirds like a letter, flatten it with your hands, and put it through the roller again. Sprinkle with a little flour as necessary so that dough doesn't stick. Repeat the folding and rolling process 4 times.
  3. Set the pasta roller to the next thinner setting. Feed the dough through. Keep reducing the setting and feeding through the dough making it thinner and thinner each time. I roll mine out to the thinnest setting on my machine. As you thin out the dough, it will get longer and longer. When you crank it through, don't stop in the middle or it will stretch and tear. Feed it with one hand and turn the crank with the other. As soon as you see the dough show out the other end, you can let go of the dough from the top and use that hand to pull it out the bottom. This does take some practice to master, especially that each pasta machine is a little different. Experiment to see what works for you.
Trouble shooting:

The dough sticks to the machine
Try sprinkling the dough with flour before rolling it with the machine. If it still sticks, your dough might be too wet. Try using less water next time.

The dough tears when it goes through the machine
Collect the torn up dough. Knead it into a ball, flatten it out and try again. Sometimes this happens with perfectly good dough. If this happens with every piece of dough that you try, you might need to adjust the proportions of liquid to dry ingredients next time.

Variations:
Once you master the basic recipe, feel free to experiment. You can make a Piedmont pasta by using only egg yolks for your liquid. You'll need a ton of them. There is a reason this is called a 40 yolk pasta. I find that even substituting 1 egg with all yolks gives the pasta a nice rich silkiness. Or you can make a leaner pasta by using only 1 egg and more water. Start with 1/2 cup of liquid ingredients for 2 cups of flour and then add water as necessary to get the right consistency.

I haven't taken any pictures of shaping ravioli and it's so much easier to show than to explain. I'll try to do it again and write a post about it.